If you’ve been frustrated by your short and/or thin hair that limits styling possibilities, the good news is that hair extensions have come to your rescue! They help add instant length and volume to natural hair and come in various types to suit different needs. You may want to consider their application methods before making a decision, so keep scrolling down for a guide on how to apply hair extensions.
How To Apply Hair Extensions: A Beginner’s Guide
1. How to apply hair extensions?
1.1. How to apply tape-in hair extensions
Divide your hair:Create a horizontal part near the back of your neck to separate your hair into sections. Secure the upper part with a clip to keep it out of the way.
Select a fine strand of hair: Using a rat tail comb, pick a thin strand from your unclipped natural hair. Ensure the strand is thin enough to allow the tape to adhere. If you can easily feel your fingers through the hair, you’re ready to proceed.
Place the tape: Remove the backing from the adhesive side of a tape-in hair extension. Affix the extension tape close to the root of the natural strand, maintaining a gap of approximately ¼ – ½ inch from the scalp. Press firmly to ensure a secure attachment.
Sandwich the strand:Take another tape-in extension with the adhesive side exposed and press it onto the first tape. This sandwiches a thin section of your natural hair between them. Ensure proper alignment.
Repeat the process for the remaining hair:starting from the back of your neck and working your way up so that you can complete the guidance on how to put in hair extensions of this tape-in type.
How to apply tape-in hair extensions
1.2. How to apply weft hair extensions
Create braids: On how to apply hair extensions of this type, the first step is creating cornrow braids that closely follow the contours of your scalp, serving as the base for attaching weft hair extensions. The size and direction of these braids can be adjusted based on your preferred style.
Secure anchor thread:Thread a curved needle with a sturdy, matching thread and secure it at the end of one of the braids to anchor it for the sewing process.
Position the extensions: Align the weft hair extension with your natural hairline along the braid. You may need to trim the weft to ensure a perfect fit on the braid.
Begin sewing: Employ a basic stitching technique to sew the extension weft onto the braid. Pass the needle and thread through both the weft and the braid, creating a secure stitch. Repeat this stitching process along the entire length of the weft.
Continue weft placement: Repeat the attachment and sewing process with additional wefts, progressing upward on the braids. Allow some space between wefts to enable your natural hair to fall and conceal the extensions.
Final stitch: Secure the last weft with a final stitch once all wefts are attached. Ensure the extensions are evenly distributed and comfortable.
How to apply weft hair extensions
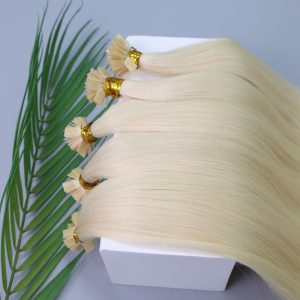
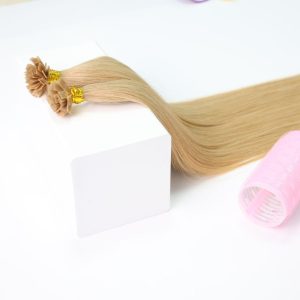
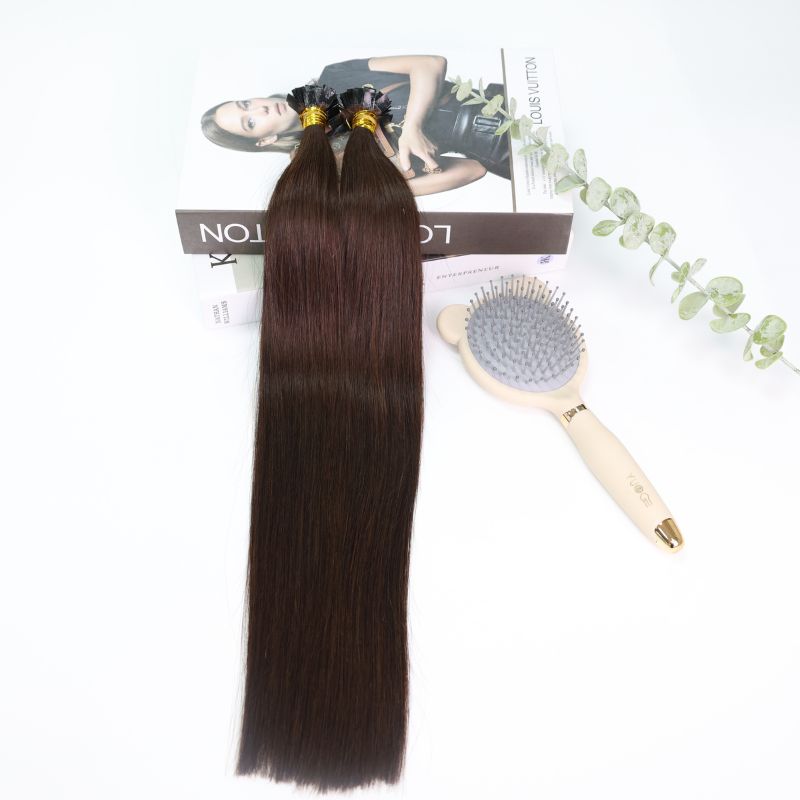
1.3. How to apply keratin tip hair extensions
Divide your hair:Create a horizontal part at the back of your neck, separating your hair into sections. Use a clip to keep the upper section away and distinct from the rest.
Pick a small hair strand:Select a small strand from your unclipped natural hair, ensuring it is approximately the same width as the extension strand.
Position the extension: Hold the keratin extension strand alongside the natural strand, placing it about ½ inch away from your scalp. This spacing allows for a secure and comfortable attachment.
Apply heat:Utilize a heat fusion tool or heat clamp designed for hair extensions. Clamp the tool over the keratin bond where the extension and your natural hair meet. Keep it in place for around 5 seconds. The heat will melt the keratin, bonding the extension with your natural hair.
Seal the bond:Upon releasing the clamp, pinch and gently roll the bonded area between your fingers for a few seconds. This action helps ensure a strong and durable bond.
How to apply keratin tip hair extensions
1.4. How to apply clip in hair extensions
Divide your hair: Create a horizontal part near the back of your neck, separating your hair into sections. Clip the upper sections of hair away.
Choose Extensions: Pick out clip-in extensions that match your desired length. These extensions come in different widths tailored for various areas of your head. Refer to our post on how to apply clip-in hair extensions for more details.
Open the clips:Before attaching them, open all the clips on the extensions.
Start with the bottom: Commence with the lower section of your hair. Lift a thin layer of your natural hair and gently tease it at the roots to provide a solid foundation for the clips.
Clip placement:Place the first extension along the teased section, close to the scalp but not overly tight. Snap the clips shut, ensuring a secure grip onto your natural hair is when you got how to apply hair extensions of clip-in type.
How to apply clip in hair extensions
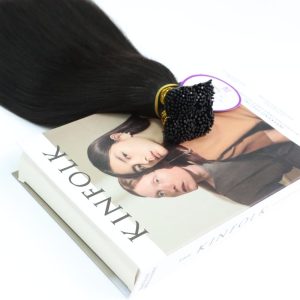
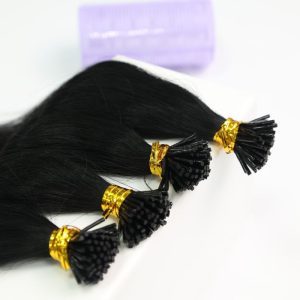
1.5. How to apply I-tip hair extensions
Divide your hair:Create horizontal parts at the back of your neck, forming sections. Clip the upper sections of hair away to keep them separate.
Choose a small hair strand: Select a small strand from your unclipped natural hair, making sure it matches the width of the extension strand.
Thread the microbead: Use a loop tool or pulling needle to thread a microbead, pulling the natural hair strand through it. Place the bead about ½ inch away from the scalp to allow your hair to breathe.
Insert the I-tip strand through the microbead: Place an I-tip hair extension strand into the microbead.
Secure the bond: Use special pliers to firmly clamp the bead shut. This action helps create a secure bond between your natural hair and the extension.
How to apply I-tip hair extensions
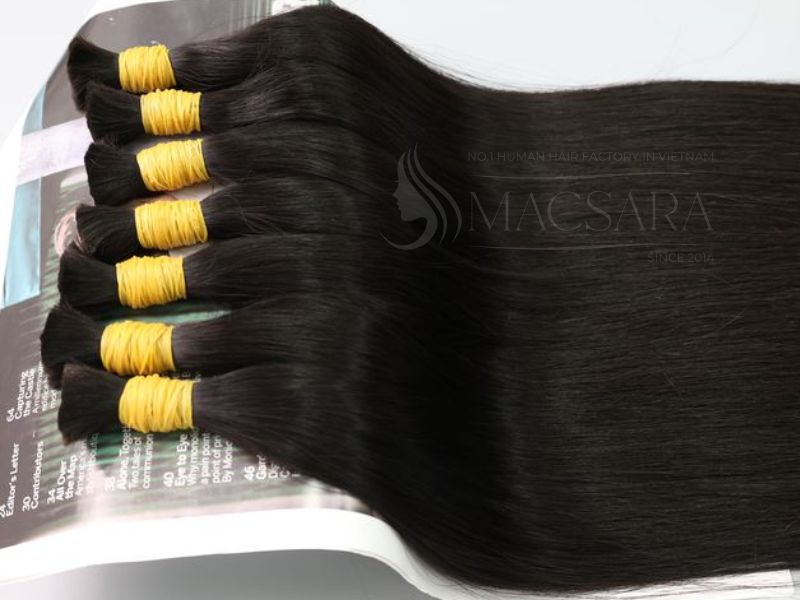
1.6. How to apply bulk hair extensions
Bulk hair extensions are known as the raw materials for creating any other type of hair extensions, and they can also be used for braiding hair to create longer braids. Now let’s learn how to apply hair extensions with bulk hair extensions used for braiding hair:
Divide your hair: Divide your hair into three or four large sections by creating a horizontal part from ear to ear and another part from the forehead to the crown or the nape of the neck. Secure each section with covered elastic bands or large clips.
Create smaller sections for braiding:Starting at the nape of your neck, divide each large section into smaller sections, about ¼ to 1 inch wide, depending on the desired size of your braids.
Attach bulk hair extensions: Take a section of hair extensions that matches the thickness of the section you’re about to braid. Fold the hair extension near the top like a candy cane, creating a shorter and a longer end. Hook the extension over the natural hair section you will braid, with the short end hanging on one side and the long end on the other. Hold the hair taut and close to the scalp.
Begin braiding:With the hair extension in place, you’ll have three sections to braid: the shorter extension piece on the left, your natural hair in the middle, and the longer extension on the right. Pull your natural hair to the left, the shorter extension to the middle, and the longer extension to the right. Continue crossing these three sections over each other, maintaining tension but not pulling too tightly to avoid discomfort.
Complete the braiding: Continue braiding until your natural hair is fully interwoven with the extensions. Keep braiding with the extension hair until you reach the end. For micro or tree braids, you can use a slipknot to secure the ends and let them hang loose. Otherwise, braid to the end and secure with a small elastic band.
How to apply bulk hair extensions
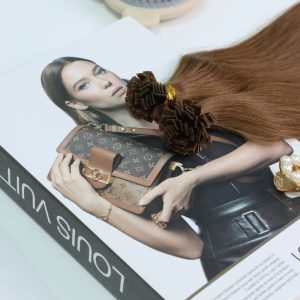
1.7. How to apply ponytail hair extensions
Brush your hair and hair extensions to remove any tangles or knots.
Gather your hair into a ponytail (if you use wrap-around ponytail hair extensions) or a bun (if you use drawstring ponytail hair extensions), positioning it a little bit higher than it is meant to be.
Place the hair extensions over your natural ponytail. Open the comb underneath the base and slide it onto the top front of your natural ponytail.
Wrap the velcro base around your own ponytail if they are wrap-around ponytail hair extensions. If you use drawstring ponytail hair extensions, pull the string until it is snug against your bun and then wrap the string around it. You can also wrap a small section of hair around the base to conceal it.
Finish by securing your hair extensions with some bobby pins.
How to apply ponytail hair extensions
1.8 How to apply halo hair extensions
Section your hair: Gather the top section of your hair into a bun, leaving two inches of hair at the sides for a natural blend later
Place the halo hair extensions over your bun where you parted your hair, adjusting the wire to fit your head. It should sit firmly below your occipital bone.
Secure any clips that come with your hair extensions and style your hair as you want.
How to apply halo hair extensions
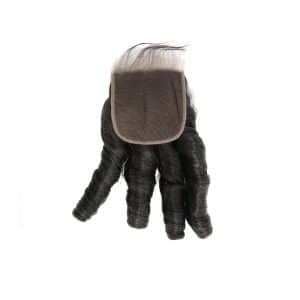
1.9. How to apply lace closure and frontal
Create cornrows: Braid your hair into cornrows, which should be small enough to create a flat foundation.
Position the hairpiece: Place the lace closure or frontal over your part to ensure it aligns with your desired style and covers your cornrows. It should lay flat against your scalp for the best results.
Secure the edges of the hairpiece:Thread a curved needle with thick, sturdy thread. Start by tacking down the left side of the closure, sewing it to the cornrow along your hairline. Then thread a second curved needle with sturdy thread and tack down the right side of the closure.
Sew down the front of the closure:Create a horizontal part just behind the front edge of the closure to ensure it’s aligned properly. Begin sewing from the left side, moving towards the part, then sew your way back along the front edge.
Sew the sides and back:Whipstitch your way along each side of the closure towards the back. Start on the left side and sew along the side edge, stopping at the back center. Repeat on the right side, ensuring the closure is tightly secured.
Sew in weft hair extensions: After securing the lace closure or frontal in place, sew in weft hair extensions around your head, starting from the nape of your neck and moving upwards until you reach the edge of the hairpiece. This is to ensure your entire head is covered.
Cut the excess lace before brushing your hair thoroughly and styling it for a seamless blend.
How to apply lace closure and frontal
1.10. How to apply human hair wigs
Braid your hair into cornrows to create a smooth surface. If your hair is short, you can pin it away from the hairline.
Prepare your skin by wiping the hairline with a cotton pad dipped in an alcohol solution, followed by applying a scalp protector.
Put on a wig cap, making sure it is aligned with your hairline and all of your hair is underneath it.
Position the wig on your head and adjust the straps to ensure it’s snug but not too tight.
Use adhesive (optional): You can apply a wig adhesive for extra hold. Spread a thin layer of wig glue or adhesive along your hairline, being careful not to get it on your natural hair. Let the adhesive dry a bit before attaching the wig.
Secure the wig: Place the wig on your head, aligning it with your hairline. Press the front of the wig onto the adhesive or along your hairline to ensure a smooth fit. Adjust the back of the wig to sit comfortably at the nape of your neck. Secure any loose areas with bobby pins or wig clips.
How to apply human hair wigs
1.11. How to apply human hair toppers
Open all the clips on your hair topper.
Place the topper over the area where you need extra coverage, typically the crown or the top of your head. Make sure it aligns with the parting or thinning area and the front edge of the topper aligns with your hairline.
Secure the clips in the front, then the back, and finish with the sides. Make sure the topper is tight but not overly so for a secure yet comfortable fit. If you feel any discomfort or pulling, unclip that section and reattach it more gently. The base of the topper should feel secure without causing strain or discomfort.
Ou post on how to use hair extensions would be incomplete without the following tips we’ve put together just for you. Let’s check them out!
2.1. Wash and thoroughly dry your hair
Before adding any kind of hair extensions, ensure your hair is entirely clean and dry. Use a mild shampoo to wash away extra oil and product residue. Having clean and dry hair creates a smoother surface for attachment, reducing the risk of hair tangling and hair loss throughout the application.
2.2. Prep enough materials required
If you’re putting in hair extensions on your own, ensure you gather all the required materials and tools in advance. Having everything ready before you start will make the process of the application of hair extensions go smoothly.
2.3. Avoid attaching hair extensions too close to the scalp
A frequent error made by those doing their own hair extensions is putting them too near the scalp. This can result in discomfort, restricted scalp movement, and potential harm to both the extensions and your natural hair. Hence, it’s crucial to be cautious and leave a small gap of ½ – ¼ inch between your hair extensions and your scalp.
2.4. Seek expert advice if necessary
While certain hair extensions like clip-in or tape-in ones can be easily applied at home, other varieties such as weft, keratin, or microlink extensions demand specific tools and the expertise of a hairstylist. Trying to apply these on your own may lead to unfavorable outcomes or damage, so feel free to consult a professional if required!
Seek expert advice if necessary
Conclusion
And there you have it – basic instructions and practical advice on how to apply hair extensions! If you’re seeking detailed instructions for a specific type, we already have (and will soon have) a post tailored just for you. We hope you’ll find this information useful, and remember that Macsara Hair is always here to support you in achieving your dream hair!
If you’re in search of a reliable supplier for high-quality hair extensions, Macsara Hair, also known as a leading Vietnam hair factory, has always been proud to be your top pick. Our extensions are crafted from 100% Vietnam raw hair, ensuring they mimic the look and feel of your natural hair. With various types, textures, colors, and lengths, they provide versatility and maximum durability. Feel free to restyle or re-dye your extensions as you please. Reach out to us now at +84 98 6980 492 for 24/7 support and factory direct prices!