

If you’ve been looking for a way to switch up your hairstyle without making a permanent change, there is nothing better than a set of clip-in hair extensions. These hair extensions are loved due to their convenience and ease of use as they help you transform your look in a matter of minutes. That being said, putting in clip in hair extensions can be a little bit confusing for beginners. But don’t worry, we’re going to help you learn how to put in clip in hair extensions the easiest way!

Before diving into the application process, it’s helpful to understand what exactly clip-in hair extensions are first. Clip-in hair extensions consist of hair wefts with small clips sewn onto the base. These clips are ready to use and help secure the hair extensions.

Clip-in hair extensions often come in a set of 7 or more pieces, each designed for a particular position. Therefore, learning how to put in clip in hair is not just about keeping the hair extensions in place but also about placing them where they are intended to be.
Read more: What Are Clip-In Hair Extensions? Everything You Need To Know
As there are various types of hair extensions, why should you choose clip-in hair extensions? Clip-in hair extensions come with a lot of benefits that make them an attractive option for many hair lovers. Now let’s take a closer look:

Before learning how to put in clip in hair extensions, you must have the right clip-in hair extensions. But how can you choose the right products for you? Follow our top tips below:
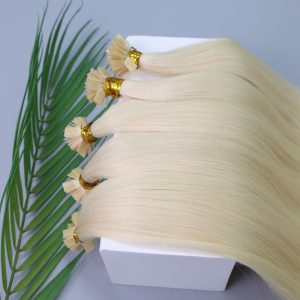
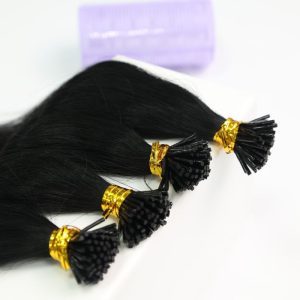
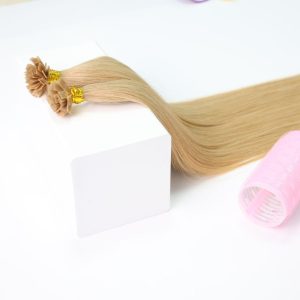
Clip-in hair extensions can be made from synthetic or human hair. We always recommend you choose human hair extensions as they provide a natural look and feel that synthetic hair cannot. Moreover, synthetic hair extensions will tangle after just a few washes and cannot be dyed or styled. Human hair extensions, on the other hand, can last up to 1 year without tangling or shedding if cared for properly and offer you endless styling possibilities.
Traditional clip-in hair extensions are pretty thick and heavy so they are just recommended for those with medium to thick hair. If you have finer or thinner hair, opt for seamless clip-in hair extensions, which are designed just for you! They are thinner and more lightweight and therefore put less strain on your scalp.
At Macsara Hair – a reliable Vietnamese hair supplier with more than 15 years of experience in the hair industry, you can find both types of clip-in hair extensions in various textures, lengths, and colors. They are made from 100% high-quality human hair, ensuring the utmost natural look and feel. Plus, they can last up to 1 – 2 years and can be dyed and styled without much damage if cared for properly.

When it comes to choosing clip-in hair extensions, it’s essential to choose a suitable length and a matching color to achieve a seamless blend. It may be tempting to choose hair extensions that are much longer than your hair for a dramatic change, but you should add no more than 3 inches to your natural hair for a natural and balanced look.
In terms of hair color, go for what is closest to your natural hair color. In case it’s hard to find the exact color you want, choose a lighter shade if your hair is light-colored and a darker shade if your hair is dark-colored.
Before putting in clip in hair extensions, make sure you have all the necessary supplies ready:
As a standard set of clip-in hair extensions consists of 7 pieces, we’ll show you how to put in 7 piece clip in hair extensions. Let’s dive into the steps!
Start by gently brushing your hair to get rid of any tangles, starting from the bottom and moving upwards. Then, use a fine-tooth comb to make a clean part across the nape of your neck. Secure the top part of your hair with clips to keep it separate while you work on the lower section.

Take the first 3-clip weft and comb through it. Before attaching it, ensure it lines up perfectly with the part by checking it against your head and adjusting it if necessary.
Comb through the lower section and gently tease the roots where you’ll attach the clips for a firm grip. Open all the clips on the weft and place it along the parting, ensuring it’s centered. Start by attaching the middle clip and bending it until it clicks securely. Then, fasten the left and right clips, pulling the weft taut along the way. By releasing the top section of your hair to hide the weft, you are done with the first weft. Just repeat these steps for the pieces remaining.

Now you need to section your hair again to apply the 4-clip weft, the largest weft meant for the widest part of your head. Following the same technique, move the parting line to just above your ears and clip the top section away.
Put the weft along the parting line to figure out the best placement. Then, comb through the lower section and lightly tease the roots. Start by clipping on the two middle clips. Then, pull the weft taut before attaching the side clips. Let down the top section of your hair to hide the weft.

Now, you’ll notice there’s one more weft with three clips. Make a parting line around two inches below the crown of your head, and hold the top section in position with a clip. Brush the lower section and tease the roots lightly as usual.
Take the 3-clip weft and position it in the middle of the parting line. Attach the middle clip first, then the side clips. Once they’re in place, you’re done with attaching the clip-in hair extensions at the back of your head. Now, you just have the small clip-ins left for the sides of your head.

The 2-clip wefts are designed to increase the length and thickness of the hair on the sides of your head, blending seamlessly with longer hair extensions. Take a straight section of hair, approximately two inches above your ear on one side, and clip the rest of the hair away. Attach the clip-in close to the hairline as you normally would, then do the same on the other side.

Now you’re left with just two small clip-in hair extensions. You can apply them on the sides of your head, positioning them just above (approximately 1-2 inches above) the 2-clip wefts, or wherever you desire extra volume.

Once you have finished putting in clip in hair extensions, brush your hair thoroughly to blend the layers. Then you can trim your hair or style it if necessary for a natural-looking result.
Conclusion
Applying clip-in hair extensions is an easy process that can be done from the comfort of your home. Once you’ve got the hang of how to put in clip in hair extensions, you’ll be able to get a stunning hair transformation in less than 15 minutes!
For high-quality yet affordable clip-in hair extensions or any other type of extensions, feel free to contact us at +84 98 6980 492 for more details and the best deals!