

When it comes to protective hairstyles for natural hair, braids reign supreme. They’re not only stylish but also protect your curls from damage. However, it’s important to note that not all braids are the same. Within the vibrant creativity of the black hairstyling community, two popular styles stand out: knotless braids vs box braids. Although these styles may look similar, they have distinct differences. Let’s clarify them and find the one that is suitable for you.

Knotless braids are said to be the low-tension answer to box braids. To start, let’s make their definition clear.
Knotless braids are a variation of traditional box braids that start with your natural hair without the small knot used to anchor standard box braids. This method involves gradually feeding braided hair into small sections of your natural hair, which allows for a smoother, flatter appearance at the roots.

Box braids are a widely favored style where the braider forms a small knot at the base of each braid to attach the extension securely to the natural hair. This knot is part of what gives box braids their distinctive appearance. Typically, the hair is parted into uniform square or box-like sections during this braiding process.

The main difference between knotless box braids and traditional box braids lies in the presence of a knot, but there are other key distinctions as well:
Traditional box braids start by wrapping extension hair around the client’s natural hair, creating a knot at the scalp that can be tight and irritating, potentially causing breakage. Traditional braids can create more tension in the hair, whereas knotless braids feel lighter and reduce the risk of tension-related damage.

Knotless braids are often considered a protective style because they shield the hair from environmental damage and over-styling. Knotless braids help maintain the texture and protect the fragile ends of hair, even promoting hair growth, according to some stylists.
Knotless braids get their name from the absence of a knot at the base of the braid. Unlike traditional box braids, which start with a knot right at the scalp, knotless braids begin with braiding the natural hair at the root without initially adding extensions, resulting in a smoother, flatter look at the root.

Traditional box braids often require a lot of extension hair, which can weigh down the head and make it feel stiff, sometimes taking days to loosen up. In contrast, knotless braids use less hair, making them lighter and allowing for more immediate styling flexibility, like pulling hair into a bun right after installation.
Overall, when comparing knotless vs box braids, both styles serve as protective hairstyles, knotless braids offer advantages in terms of comfort, scalp health, and less weight, making them a preferable option for many.
Considering these factors can help you decide whether box braids vs knotless braids are the right choice for you, balancing the benefits against the investment of time and money.


This detailed approach will help you achieve professional-looking knotless braids at home, ensuring your hair remains healthy and stylish throughout the wear period.
Start with hair that’s been washed and conditioned to lock in moisture, which is essential since your braids will be in for a while. Ensure your hair is completely dry before braiding, using a blow dryer with a heat protectant to prevent damage.
Smooth out any knots or tangles using a leave-in conditioner to make detangling easier and add extra moisture. Start detangling from the ends and work your way up to the roots with a wide-tooth comb.

Divide your hair into four sections (or more for very long or thick hair), securing the sections you’re not working with using hair ties or claw clips to make the process more manageable.
Apply a nourishing hair cream or some more leave-in conditioner to each section, paying extra attention to the ends, to keep your hair moisturized while in braids.
Use a rat tail comb to part your hair into the desired pattern (boxes, triangles, etc.). Make sure the parts are clean and even to prevent pulling hair from neighboring sections, which helps give your braids a neater appearance.

Begin braiding by applying some hair gel to the roots for grip. Start with a traditional three-strand braid and gradually feed in the braiding hair as you go, maintaining a balance so that you don’t apply too much tension on your scalp.
Once a braid is complete, apply a holding spray from root to end to help bond your natural hair with the braiding hair and prevent unraveling. This step ensures your braids stay intact longer.
Repeat the braiding process on all sections, starting from the back of your head. If you need a break, the front sections can be styled into a bun for a temporary half-up, half-down look.

Finish by applying a volumizing hair mousse from root to tip on each braid to add hold and ensure your style lasts as long as possible.
After your braids have fully absorbed the mousse, it’s time to add the final touches. Professionals often dip braids in hot water to seal everything in, but if you’re unsure about this step, it’s best to skip it when doing your braids at home. Instead, give your braids another spray with a shine-enhancing hairspray. This will add a nice appearance to your braids and help keep them looking fresh.
Caring for knotless braids involves maintaining both the braids and your natural hair underneath. Here are some essential tips to keep your knotless braids looking fresh and your scalp healthy:
Regularly clean your scalp to prevent the build-up of oils, sweat, and product residue. Use a diluted shampoo or a cleansing spray specifically formulated for braids. Focus on the roots and scalp, using gentle motions to avoid disturbing the base of the braids.

Moisture is crucial to keeping both your braids and natural hair healthy. Apply a light leave-in conditioner or a braid spray that doesn’t weigh down your hair. You can also use natural oils like coconut or jojoba oil on your scalp and the length of your braids to keep them hydrated.
Wear a satin scarf or bonnet when sleeping to reduce friction, which can lead to frizz and breakage. Alternatively, use a satin pillowcase to achieve the same effect if head coverings are uncomfortable for you.
Minimize frequent styling and tight updos that can stress your edges and scalp. Let your braids hang loosely as much as possible to reduce tension and help them last longer.
Depending on how fast your hair grows, the area around your hairline may start to look fuzzy. You can gently touch up these edges using a small amount of gel or edge control product to keep your hairstyle looking neat.

Whenever you wash your braids, ensure they are thoroughly dried to prevent mildew or bacterial growth. Air drying is best, but if you need to speed up the process, use a hooded dryer in a cool setting.
If you plan on keeping your braids for several weeks, consider visiting your stylist for occasional maintenance to ensure your braids and natural hair remain in good condition.

Pay attention to any signs of tension or stress, particularly around your edges. If you notice any discomfort, itching beyond the norm, or hair loss, consider removing the braids to avoid further damage.


Start with a clean base by washing your hair with a clarifying shampoo. Follow up with a hydrating hair mask to prevent breakage.

Apply your favorite leave-in conditioner for added moisture. Use a hair protectant before blow-drying to protect and repair your hair.
Section your hair into manageable parts, using hair bands to keep unbraided sections out of the way. This helps in creating clean and even braids.
Place a piece of braiding hair atop your natural hair and start a three-strand braid, incorporating your hair with the braiding hair.
As you reach the end of your natural hair, blend it into the braided hair. Use a styling gel to add shine and hold without crunchiness. Detangle as you go to ensure smooth braiding.

When you’re down to two strands, split one to return to a three-strand braid and continue to the ends. Apply edge control and gel to tame any flyaways.
Dip the ends of the braids in hot water to seal them. Use a foam mousse l for a lasting hold and to tame flyaways. Lay your baby’s hair using edge control for a polished look.
Taking care of your box braids is crucial for keeping them looking good and maintaining the health of your hair underneath. Here’s a straightforward routine and some tips to help you manage your box braids effectively:

Washing knotless braids requires a gentle approach to prevent frizz and maintain the integrity of the style. Here’s a step-by-step guide:
Mix a gentle shampoo with water in a spray bottle. This diluted mixture will make it easier to apply the shampoo evenly to your braids and scalp.

Spray the diluted shampoo onto your scalp and along the length of your braids. Gently massage the shampoo into your scalp using your fingertips, focusing on any areas that feel particularly oily or dirty.
Rinse your braids and scalp thoroughly with lukewarm water. Be sure to remove all traces of shampoo to prevent residue buildup, which can lead to itchiness and irritation.
If your braids are feeling dry or tangled, you can follow up with a lightweight conditioner or leave-in conditioner. Apply the conditioner sparingly to avoid weighing down your braids, then rinse thoroughly.
Gently pat your braids dry with a soft towel to remove excess water. Avoid rubbing or wringing your braids, as this can cause frizz and damage the hair.
Allow your braids to air dry completely before styling or applying any additional products. Avoid using heat styling tools on wet braids, as this can weaken the hair and cause breakage.
While your hair is braided, your scalp still needs attention. Keep it well-nourished with a strengthening oil to prevent itchiness and maintain a healthy scalp environment.

Ensure your braider is gentle and avoids pulling your hair too tightly to prevent scalp tension and hair breakage. Similarly, be very gentle when removing your braids to avoid damaging your hair.
Wearing a satin or silk bonnet while sleeping is crucial to reducing friction, preventing breakage, and helping your braids last longer. If bonnets aren’t your preference, a silk scarf is a good alternative; just ensure it’s securely tied to avoid slipping off.
It’s easy to overlook moisturizing when your hair is braided, but your natural hair still needs hydration. Use a curl refresh spray regularly to keep your hair moisturized, and apply a few drops of scalp and hair oil not only to lock in moisture but also to add a bit of shine to your braids.
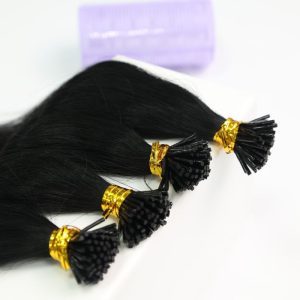
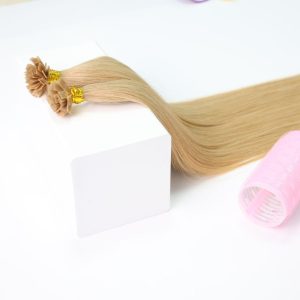
Have you chosen your favorite braids? Box braids and knotless braids are both popular protective hairstyles for natural hair, and their appealing look explains their popularity. Each style has distinct characteristics that make it special, so feel free to experiment with both to see which one suits you best. For a fuller look in braids, how about trying hair extensions at Macsara Hair? As the leading Vietnamese hair factory, we provide premium quality wholesale hair products that come in various colors, lengths, and textures. Don’t hesitate to contact us at +84 98 6980 492 for more details and 24/7 support!